Wednesday, November 26, 2008

November in the Patch

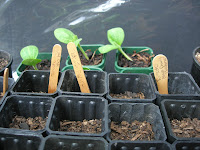
Lovely bit of rain and what a start for our seeds & seedlings we have been nurturing over the last couple of months

The vigour of growth in the vegetable garden is always helped along by enriching the soil. I have worked a combination of sheep & chook manure, blood and bone and mushroom compost into the soil, ready to plant the greediest of the vegetables; the pumpkins, zucchini and cucumbers. Because of my space constraints zucchini and squash are planted alternately along the edge of a garden bed to hang over, and in this way they will take up minimal room, and my cucumbers are growing in a pot fed fortnightly a with a liquid brew of compost, chook and sheep manure, comfrey leaves.

Our wonderful range of beans that Virginia kindly donated can be planted: Jade Beans are a favourite for flavour; Scarlett Runner Beans are the traditional, old fashioned climbing beans unsurpassed for flavour; Purple King Climbing Bean is a good variety for warmer climates. It does not matter if the seeds are sown too close together, as they are easy to thin out later when the seedlings come up.i have planted them out in my egg carton seed trays as i have a big problem with Slater's, they eat off the young emerging shoots before they even break the surface, then planted out in the last weeks of Nov. When the first flowers are starting to grow into little beans i plant another half dozen plants then I always have a steady supply of good healthy plants. Virginia suggested to me to plant several varieties of beans for saving at opposite ends of yard.

I'm trying a three sisters bed of corn modified to suit with some climbing cucumbers at the outside edge of each row. They will climb up the sweet corn plants and the bed will give you a double harvest.

This is the perfect time of year to plant those tender vegetables, the ones that are frost sensitive. Tomatoes need warm soil and warm weather to thrive and ward off diseases. if there is a late November cold snap water them with a seaweed and fish emulsion as per directions hopefully they wont suffer too much of a setback, and avoid them becoming weakened to most diseases. At the bottom of my planting hole, two or three crushed chicken eggshells (cheap organic source of calcium) blood and bone heaping tablespoon of pure worm castings, two plain aspirin tablets. Aspirin has been shown to increase disease resistant of tomatoes, in addition to increasing blossom production. Fill hole with a little soil then plant on top. I then water fortnightly with worm tea , seaweed concentrate and two aspirin watered down to a weak tea colour and sprayed on plants as a foliar feed.

The garlic and onion bed has been successively planted from autumn right through the coldest part of winter. If the garlic foliage takes on a peculiar colouring then it indicates that it is just becoming mature, and if it bolts to seed it does not affect the bulbs. But the opposite is true with onions. The potato onions are starting to divide up into their individual bulblets, and are thriving.
Garlic, which I'm not sure where it came from, are little sweet nuggets of flavour.

And this from the SS discussion board

Real Spinach and Freezing Kale
25 November 2008
Ever wanted a real spinach taste or wondered how to keep all that kale?
Robyn Williamson, coordinator of North Western Sydney Community Seed Savers recently went to the Aldinga Farmers Market just outside Adelaide.
She was delighted to run into organic vegetable growers, Poppy and John [pictured below] who were selling "Real Spinach from The Seed Savers Network". Poppy told her "Jude Fanton was here about three years ago and gave me the seeds." It is called European Spinach and is wider and thicker and lighter green than Foodhook type beets. The flavour is much more mild, not bitter, with a hint of mushroom in there.
Robyn reports: Poppy is originally from Egypt and gave me a wonderful tip about preparing her delicious kale. She told me, "After harvesting, wash the leaves and keep them in the freezer until you are ready to steam or stir fry them. Kale is exposed to freezing temperatures in its natural habitat and freezing the leaves before cooking enhances the natural sweet flavour."

This article can be found on the Web at:
http://seedsavers.communityfoods.com.au//news/1227585119_16873.jsp
This message has been generated automatically using Social Change Online's AIMS Web publishing suite.

Wednesday, November 5, 2008

Here are some more Rushworth Pics,

Here are the pictures I took


Rusworth P12 Stephanie Alexander Kitchen Garden


St Marys P.S.


Rushworth B&B cottage garden


Iris Farm


Rushworth Community Garden
thanks Billie.

Sunday, November 2, 2008

Rushworth open garden day was great. Time was limited so I visited 4 of the 6 gardens.


succulents used to create a dividing wall - community garden


cement sofa

interesting raised bed


The wood fired pizza ovens were a feature. Examples at both community garden and college. The ovens are made from half bricks gradually tapered in then rendered.


Rushworth College - neat way to use tyres to make a wall. The beds in the background were made from sand bags and then rendered.


Wednesday, October 22, 2008

Q and A

Why did my seeds not come up?
Seedlings may not have emerged from the potting mix or from the soil for these reasons:

  • Seeds were too old, or infertile for other reasons – use better seed
  • Too little water – water more regularly
  • Too much water – hold off water and increase drainage
  • Arrested water supply – this happens when you water, then stop watering causing the germinating seed to die
  • The seedlings may have emerged but been bitten off before you noticed them – check for snails, slugs and earwigs, slaters or cutworms around the stems and use natural pest control.
  • Seedlings may emerge then suddenly die; this is usually due to ʻdampening offʼ which is a fungal attack to the young stem – if in pots, raise the level of the potting mix so as to avoid having damp air stagnating around the young plant.

The Three Sisters are a special family....

Who are the Three Sisters?
“In late spring, we plant the corn and beans and squash. They're not just plants - we call them the three sisters. We plant them together, three kinds of seeds in one hill. They want to be together with each other, just as we Indians want to be together with each other. So long as the three sisters are with us we know we will never starve. The Creator sends them to us each year. We celebrate them now. We thank the Creator for the gifts given us today and every day.”
Chief Louis Farmer (Onondaga)

The Three Sisters, corn, beans, and squash, are the traditional Native American garden foods of North America.
Each of the Three Sisters helps the others grow.
- Beans give nitrogen for the other sisters.
- Corn supports beans.
- Sprawling squash vines with prickly leaves protect from hungry animals, and hold in the
soil moisture on hot dry days.

The Three Sisters teach a sophisticated way to farm that evolved over generations of watchful farmers. Indigenous knowledge is the practical experience and living traditions of Native people passed on from generation to generation. Native American farmers observed that corn, beans and squash are stronger when grown together rather than separately. Why? Growing corn in straight rows wastes planting space, does not follow the natural contours of the Earth and requires heavy fertilization. Beans like a support system to hold on to. Squash and corn need
abundant nitrogen from the soil. Each of the three sisters has an important function. As corn grows straight and tall, beans cling onto the strong corn stalks for support. The broad prickly squash leaves hold in soil moisture and protect from marauding animals. The leguminous beans breathe in atmospheric nitrogen, absorbing it into the nitrogen-fixing nodules on their roots, and then give it to the soil to fertilize the other two hungry sisters.


Planting a Three Sisters Garden
In Spring when the oak leaves are the size of a deer’s ear - stand with two other friends in garden soil ready for planting. Clasp each other’s hands to make a circle together. Place your circle three people’s outstretched arms from other people’s circles. Everything in your circle is part of the Three Sisters garden. Look up to see the birds and bugs flying above your circle. Look down to the soil creatures crawling under the soil. All the life in the circle above and below is part of the Three Sisters Garden.

Make a hill of a hand height in the soil that is the same size circle as your arm-circle (about 2-3 feet
across). In the center plant seven corn kernels a hand apart in a circle. When the corn has grown as tall as your hands – plant beans a hand apart in a circle around the corn. Plant seven squash seeds around the edge of the circle. As the beans grow gently wind them around the corn. As the squash grows, guide them outside the circle.

Many Native American tribes honor the seven directions, Father Sky above, Mother Earth below, north, south, east, and west. Feel these directions with your feet firmly standing in this place. The seventh direction, the center of the circle, is in our heart.

Reprinted from 'From Generation to Generation' Fedenco Seeds Publication.

Thursday, October 2, 2008

Our Seeds

The following is our current list of Seeds for distribution.
Please send a stamped, self addressed envelope to PO Box 331 Shepparton 3630
with the details of what packets you want i can send a max of 5 packets per request.

Contact me if you have questions or have any seed to return to bank ctrant@bigpond.com.au

Broccoli Di Cicco
Broccoli Green Sprouting
Bush Bean Jade
Bush Bean sex without strings
Bush Bean Violet Queen
Cabbage Sugarloaf
Capsicum Toppepo Rosso
Carrot Western Red
Climbing Bean General Maclay
Climbing Bean King of the Blues
Climbing Bean Muffet
Climbing Bean Purple King
Coriander
Eggplant Listada Di Gandia
Eggplant Thai Green
Eggplant Tokyp long Black
Gramma Butternut
Indian Saag
Kale Lacinato
Kale Red Winter
Luffa
New Zealand Spinach
Onion Odourless
Onion Stuttgart long keeper
Pak Choi
Parsnip
Pumpkin Marina De Chioggia
Rockmelon Minnesota Midget
Snake Bean Black podded
Snake Bean Brown Podded
Snow Pea Melting Mammoth
Tomato Black Cherry
Tomato Black Russian
Tomato Tatura Bush Dwarf
Watermelon Small shining light
White Beetroot

Wednesday, October 1, 2008

October in the Patch


Spring has sprung, exciting times, blossoms, shoots and leaves with lots of promise, and the days are warming to whats ahead. its tome to plant your veges out and prepare your garden for the dry months ahead. These are the main planting time for the year, you will be planting the veges you'll be eating all summer, so take a grip, whatever you plant now you'll have to tend in December, the more you dig now, the more you'll have to weed in a months time. start small and extend your plot week by week. that way you wont start more than you can tend.

One crop plantings, that will see you through most of the year such as ,corn, silverbeet, celery, leeks, parsnips, turnips, potatoes and pumpkins and watermelons. plant enough to pick and store or if you don't fancy preserving the harvest plant only enough to eat.


Then there are the staggered croppers, - beans peas, lettuce, tomatoes, spring onions, beetroot carrot, and zucchini. Plant in succession when the first lot is just starting to flower, or form root swellings.

Prepare beds for sweet corn, by working in sheep manure laced with blood and bone, an old saying is to plant corn when the peach blossom falls- unless of course it has been frosted off.


Sow those pumpkins, zucchini and squash seeds directly or the plants that you had planted on back in August, into a lovely rich mound of mushroom compost and old manure.


Sow root crops such as carrot, parsnip, beetroot, swede and turnip. keep the seedbed moist and cover with old net curtains to keep the birds from scratching.
Plant the lase of the seedlings of cabbage, cauliflower broccoli, and kale. Seeds planted now will not develop in time before the heat of summer and will just bolt to seed.

You can get a quick crop of Chinese greens and lettuces, water well and fertilise with seaweed spray to get rapid growth before the heat of summer. Plant in dappled shade.


Spring onions can be grown now as easily as lawn. sow them in rows direct in the soil which has had a generous handful of dolomite raked through first. cover with a thin layer of soil and in two weeks they will erupt. then in 4 weeks time plant another, you'll be guaranteed a steady supply.


Celery is grown from seed sown into containers keeping the seed raising mixture quite wet. water twice daily if possible or sit them in a container of water . when big enough plant them out in a well limed soil.


Use a mulch of old manure and pine needles around strawberries for bigger sweeter yields.


Hold off on those tomatoes till the end of the month, keep watering well in pots and allow to become slightly root bound in pots that way they will jump out of their pots and set flowers early. Some more on tomatoes at end of month.

Beans and peas can go in directly where you want them to grow. Slater's can be a problem so use a collar pushed down into soil around seed made from an used yogurt container etc with the bottom cut out.


Hopefully this covers it all - if not post a comment with your expertise or a question....

Monthly Natter - September

We met last Sunday at Billabong garden centre and the gods certainly put it on for us, not only was the weather super, the lovely people at Billabong allowed us use of a lovely shaded spot with table overlooking the spring blossoms and meanderings of their customers. I urge everyone to hurry out there ASAP and buy some goodies.

Lots to talk about being our Seedy Sunday, we organised our seeds into those for selling and those for our group's use, we decided that the our list of seeds will be distributed and any one wanting them will send a stamped self -addressed envelope to Carley. the market will also continue to be a place to swap or available for purchase. Dec, Jan & Feb markets not worth doing however. Seed packets are available to download. some great ideas for next years meetings were discussed as well, anyone wanting a garden working bee, ideas for meetings or volunteering their backyard is more than welcome.

Derek brought along a big bag of new Zealand Spinach and lots of bok choi and tatsoi and fennel seeds all of which we will use at market. He was also appointed the group's authority on Chinese greens and over the growing season will hopefully have some seeds and lessons to share. Jenny was very excited on propagating some of the Marina Di Choggia pumpkins for growing on to sell at markets ... "In the time I was away My Di Choggia pumpkin came up further and a mate joined him. Very exciting stuff. Eggs, Chinese greens and lettuces were exchanged and we bid happy gardening till next time.....Carley

Friday, September 12, 2008

Monthly Natter


Amongst the emerging blossoms and a whole Lotta vegetables we all enjoyed our August meeting and International Kitchen garden day. Despite our little deviation towards Echuca we arrived and the Sun was shining, a beautiful nearly spring day.


A few new faces, and some familiar ones, a HUGE thanks to Tania & Campbell for not only hosting the day, providing us with goodies, but also for their wonderful example of a self sufficient lifestyle. their farm not only provides a welcome relief of old fruit varieties to the GV, but they also exchange their masses of produce for milk, and other produce with their neighbours. We all left inspired, some with a big planting day ahead of them and some with new ideas.


For those of you that couldn't make i have put a few pics on our web page and Cam's advice on spur pruning for apples/pears. Campbell probably has one of the best examples of espaliered peaches, cherries, apples and pears around.


Our next meeting will be Spring seedy Sunday, at Billabong Garden Centre on 28th @ 1:30. We will take stock of our collection to date and distribute our summer seeds for collection.


Till then, happy growing - Carley

Wednesday, September 10, 2008

Passionfruit


Everyone can Grow a Passionfruit .....


Passionfruit vines are known for their tendrils, which are little curly spring-like things that attach themselves to wire and really grip on like a python. That’s how they climb. Often what happens with a passionfruit vine is there is green growth on the outside, where the tendrils have attached themselves, and they have woody material in the centre. In late winter and early spring it’s time for a clean up. You don't have to prune hard every year. But in early spring take off about 30 centimetres - that’s ideal.


Varieties
There are many different varieties of passionfruit. Some to look out for include:The grafted Panama Gold - which has big fruit and its skin is a golden yellow colour. The Panama Red – which is red skinned, has rather large fruit, and is also grafted. Both are good to grow in the tropics. But for southern Australia, the grafted Nelly Kelly black passionfruit is the best choice.

Growing
A great spot for a passionfruit vine is one that’s out in the open, has full sun and no trees or competitive roots. Grow it on a structure like a strong trellis or up and over on a pergola. In the olden days every passionfruit vine was planted on top of a lamb or sheep's liver, ox heart, or some other piece of offal, to provide iron. Stick it at the bottom of the hole, cover it up a little bit, and then plant the passionfruit as normal.If you don't want to use a lamb's liver, or offal, you could use pelletised chook manure. And scatter that about a metre around the root system. Do this about twice a year. Remember that passionfruit vines are also hungry and thirsty and love a well-drained soil. It’s also a good idea to put some mulch around the root system, to protect it from the hot sun. In its first year the little vine will tendril its way across the wires. Just nip out the top little bud and it will shoot out laterally. This means you'll get lots of side shoots, and expect fruit in about 18 months.Given plenty of food, well-drained soil and lots of water, you will end up with a great passionfruit vine.


And, a little tip - when you see the fruit developing, get your little child to get a nail and scratch their name into the fruit and you end up with your own branded passionfruit.


Problems
Why do my vines flower but don't set fruit?
There are several reasons for vines flowering but not setting fruit.
Poor pollination. This is the main cause and can be due to bees not working the flowers (for example during heavy rain); temperatures being too low or too high for pollination (optimum temperatures for pollen germination are between 20°C and 35°C); or rain directly reducing the viability of the pollen (moisture causes the pollen grains to split).
Boron deficiency.
Extended periods of overcast weather. This may cause flower drop regardless of pollination problems.

Why are fruit dropping off my vine?
There are three possible reasons for fruit dropping off vines:
irregular watering in which the vines at times get insufficient water
fungal diseases
fruit fly and severe mite damage, particularly with young fruit.

Why are my leaves going yellow?
The most common cause of leaves going yellow is passionfruit woodiness virus. Other possible causes are:
magnesium deficiency
nitrogen deficiency on sandy soils
'winter yellows'. This is brought on by cold weather, windy conditions, low humidity or a combination of these.

What are these spots on my fruit and leaves?
Spots on fruit and leaves are usually caused by fungal diseases. The most likely causes are:
Alternata spot
Brown spot
Septoria spot.

Why are my fruit bumpy or malformed?
There are several causes of bumpy or malformed fruit. Here are the main ones.
Passionfruit woodiness virus. This is the most likely cause, particularly if your vines are not growing well and there are mottled yellow leaves present.
Boron deficiency.
Insect damage, particularly fruit fly.

Why are my fruit shrivelled?
There are several possible causes of shrivelled, poorly developed fruit. The main ones are:
fruit fly damage
sucking bug damage
poor pollination
boron deficiency
insufficient irrigation when a heavy crop is set.

Why are my vines dying?
There are three possible causes of vines dying.
Phytophthora blight, which shows first on the new growth, particularly after prolonged wet weather.
Fusarium wilt. This is most likely if resistant rootstocks were not used. It normally causes rapid (within one or two days) wilting of the entire plant, especially in very hot weather.
Base rot - a dry corky collar rot at ground level.

Why are my vines growing poorly?
The most likely cause of vines growing poorly is passionfruit woodiness virus. The disease is generally present at some level in most vines. When vines are growing vigorously, symptoms are not normally evident, but when vines are under any sort of stress (for example, cold weather, lack of water, lack of nutrients), the disease becomes evident and slows growth. Affected leaves are yellow and mottled and affected fruit bumpy and malformed.

Cabbage Capers

Cabbage, if your like me you always grow more than what your can use and think we all have memories of someone overcooking it to a grey mash, The notorious odor problem is a result of over cooking. and as a result, we don't use this wonderful veg.


Cabbage is easy to grow if you select suitable varieties and practice proper culture and insect management. Always regarded as a good source of vitamins, cabbage recently has been shown to have disease-preventive properties as well. As with broccoli, may reduce the risk of some forms of cancer. Cabbage is also high in beta-carotene, vitamin C and fiber

Green cabbage is grown more often than the red or Savoy types, but red cabbage has become increasingly popular for color in salads and cooked dishes. The Savoy varieties are grown for slaw and salads. Varieties that mature later usually grow larger heads and are more suitable for making sauerkraut than the early varieties.

Transplant early cabbage soon enough that it matures before the heat of summer and two or three varieties with different maturities can provide harvest over a long period. Hardened plants are tolerant of frosts and can be planted among the earliest of cool-season garden vegetables. Cabbage is easily transplanted from seedlings grown from seed sown in punnets. Use starter fertiliser of seaweed brew (see ) when transplanting and side-dress with compost & blood & bone mix when the plants are half grown. Ample soil moisture is necessary throughout the growing season to produce good cabbage. Splitting is caused by the pressure of excessive water taken up after the heads are solid, so don't over water -water little but more often.

Don't over plant just one or two plants planted out every 4 weeks over winter and early - mid spring will do, after that grow Kale. it tastes better in my opinion and can be picked as per loose leaf lettuce.

The Cabbage moth; as always prevention is better than cure so be vigilant, when you see them flitting about, hand pick grubs or just cover the whole lot. Old net curtains from op shop do the job wonderfully. You can also try making plastic butterflies or spreading white eggshells around plants as butterflies wont land where there are already butterflies around. Building the populations of natural predators is always worthwhile so grow Good bug mix http://www.greenharvest.com.au/seeds/good_bug_mix.html

Least toxic chemical control - Choosing a least-toxic spray will reduce the impact on your good bugs! Garlic spray can be used as a repellent and to kill caterpillars or Dipel, or Bt for short. This biological control is a bacterial stomach poison for all caterpillars, which is mixed with water and sprayed onto foliage. It is totally safe to beneficial insects, bees and mammals. Bt is broken down by sunlight within a few days; so repeated applications may be necessary

Last of all this is what you can do with the Stuff -

Small Scale Sauerkraut
This recipe is very easy, and it does not take all day and a bushel of cabbage. You can make 12 cups of sauerkraut from one medium head of green cabbage. Spices such as juniper berries, dill seed and garlic can be added to the cabbage, if desired.
9 cups shredded green cabbage
1/4 cup pickling salt
clean jars
Trim dark, limp outer leaves and wash the cabbage.
Remove the central core & thinly shred. As you slice, measure 9 cups into a large nonreactive bowl.
Sprinkle salt over shredded cabbage. Using clean hands, mix well.
Let stand at room temperature for 2 hours. In the meantime, sterilise jars. (To sterilize jars, place them in a large pot, cover with warm water and bring to a rolling boil. Boil hard for 15 minutes. Leave jars in hot water until ready to use.)
Rinse, drain and rinse again.
Pack wet cabbage into sterilised jars (using a wooden spoon or pestle) firmly and keep packing down until liquid rises to cover the top of the cabbage. Spices may be added between the layers of cabbage. Leave a couple of cm of head space at the top of each jar. More space is okay.
Wipe away any stray pieces of cabbage not under the liquid inside the jar. Crumple a large piece of plastic wrap and force it into the jar to exclude air from reaching the cabbage in the space left inside of the jar. Use more than one piece if necessary. Seal loosely.


Place the jars in an area where the temperature stays at 20-22°C. This is the ideal temperature for fermentation. Check the sauerkraut every few days for froth. There should be no froth if plastic is keeping air away from the cabbage. If froth forms, remove it with a metal spoon and place a fresh piece of plastic wrap in the jars.
Fermentation should cease in 2-4 weeks. The sauerkraut is ready when no more air bubbles are at the surface of the cabbage. The smell will be pleasantly pungent and pickled.
If sauerkraut is too salty, rinse it just before using. Rinse only the amount you intend to use.
Store the remainder in the refrigerator. It will keep for several months


Cabbage Curry
tablespoon vegetable oil
1/2 cup minced shallots
2 garlic cloves, minced
2 tablespoons whole-grain Dijon mustard
2 teaspoons curry powder
1 teaspoon ground turmeric
12 cups thinly sliced green cabbage (about 3 pounds)
1/4 cup chicken stock
1/4 cup rice vinegar
1/2 teaspoon salt
1/4 teaspoon black pepper

Finely slice the cabbage wash and strain
Heat oil in a large nonstick skillet over medium-high heat. Add shallots and garlic; sauté 2 minutes. Add mustard, curry, and turmeric; cook 1 minute, stirring constantly. Stir in cabbage and remaining ingredients; cook 5 minutes or until tender, stirring frequently.

CABBAGE ROLLS
2 tablespoons oil
3 to 4 cups chopped onion
2 cups chopped celery
1 cup chopped bell pepper
2kg ground beef
2kg ground pork
4 cups cooked rice
4 eggs
1 200g can diced tomato with green chilies
Salt and Pepper to taste
Cayenne pepper to taste (optional)
4 cans diced tomato
2 to 3 heads cabbage
Add the oil, onion, celery, and bell pepper. Cook uncovered over medium heat stirring occasionally until onions are beginning to brown around the edges. Remove heat.


Put a large stock pot of water to boil on the stove to make the cabbage leaves more pliable.While the onion mixture is cooking, prepare the cabbage. Cut around the core and remove the core. Remove the whole leaves from the cabbage (under running water if necessary). You should be able to remove a little over half of the head before the leaves become too small. For the above recipe, we used two heads of ‘flat head’ cabbage. In a large dish pan or other large container, add ground beef, pork, rice, eggs, can tomato with chilies, salt, pepper, cayenne (go easy, a little goes a long way) and the cooked onion mixture from the skillet. Using your well washed hands mix everything thoroughly. In the large pot of boiling water, place 6 to 8 leaves of cabbage at a time for about 2 minutes or less. The water does not have to return to a boil. You’re not cooking the cabbage, just making it a little softer. Put the slightly limp leaves aside until they’re all done. Place about ¾ of a cup of the meat-rice mixture, shaped into a meatball, inside of one leaf and roll the leave around the meat ball. Put the cabbage rolls, loose edges down, in a 6cm (or more) deep baking dish. It took us four 11 x 17 inch baking pans for this recipe. Using the remaining 4 cans of diced tomato, pour one can over cabbage rolls in each pan. You can use diced tomato and green chilies if you prefer just decrease or eliminate the cayenne pepper. Cover the pans with foil and bake at 180 C for about 2 ½ hours. Cooking time is less if you are making a smaller recipe. Cook long enough for the meat to be done.Recipe yields 30 to 40 cabbage rolls


Japanese Pickled Cabbage
3 cucumber
3 leaves of cabbage
1 thumb sized piece of ginger
less than 1 tablespoon salt
Directions
Cut cucumber into less than a bite piece.
Cut cabbage into 1/2 inch.
Cut ginger into shredded.
Put (1)-(3) in bowl add salt, push down on material with weight overnight.

Sunday, August 17, 2008

August in the patch

August brings so many jobs to be done as spring arrives, but to me August means potatoes. They can be placed directly on the surface of the soil and covered with about a third of a metre of peastraw. They won’t grow in straw alone because there is very little nourishment, so a thick layer of sheep manure and soil/compost is placed on top, then liberally apply blood and bone over this to provide calcium and nitrogen for the potatoes when they come through. The bed needs total saturation to rot down, and the manures and compost will break down through the straw and be used by the potatoes as they come through. The pile will remain moist after this initial watering, so only water as required after this. Additional straw can be added, with the crop being ready by Christmas. Don't grow them in a straw/wire ring as suggested by many, it does work, but dries out easily and thus demands lots of WATER...something we dont have the luxury of. i have grown potatoes in tyres in early spring and autumn, to extend the season. the rest of the time , and if you have the room, grow them in soil for godsake, thats where they grow best.

Artichokes - Jerusalem artichokes are a type of sunflower and their tubers make wonderful eating. They can be roasted, put in the microwave and make marvellous soups. Bury the tubers and cover with a mulch of compost, blood and bone and manure. This will seep into the soil and produce a plant with yellow-flowering daisies three or four metres tall.


Globe artichokes are an Thistle. The buds before they open are the part of the plant that is eaten as a vegetable. The flowers are a beautiful blue and the foliage is popularly used in landscaping. A proven producer of good artichokes can be propagated from offsets. These are new plants produced at the base of the parent plant. Pull them off or dig them out from the side, making sure they have a few roots, burying this new plant firmly in the ground, allowing the new plant to spread about 1.5 metres, with the same height. The edible part of this undeveloped flower makes delicious eating.

It is also time to sow peas. Dwarf Snow Peas and Snap Peas can be planted with a lattice placed in the middle of the rows to support both of them when they come through. If the rows are planted thickly with peas it will allow for the losses caused by birds, and a good crop will grow without the need to replant.

give your soil and folage a bit of a boost by watering with a brew made up - to 10 litres of water add :½ a cup of fish emulsion – 1 cup of seaweed concentrate – 3 teaspoons of zinc sulphate.-3 teaspoons of epsom salts (magnesium sulphate)Mix well. This is a very strong mixture – far too strong to apply directly to the foliage of plants. In fact it could damage or even kill young plants if applied at this strength.

Friday, August 15, 2008

Vegetable Potager

I Know this is very English and formal, but i love the all together nature with flowers thrown in and rambling over the oblesks


This design can turn even a suburban backyard into a potager (loosely translated as "a garden to make a pot of soup"). Gravel paths divide four rectangular beds, anchored by a central terra-cotta oil jar. Each bed is about 6' wide and 8' long, so you can reach in for weeding or harvesting without having to step much into the tilled soil.


The berry patch - Think about how and when you will be picking each crop before you plant. Strawberries ripen daily (and grow low to the ground), so it's important they be reachable from the path.

Guilt-free snipping -Cutting flowers, like these assorted dahlias, are traditionally grown in rows like vegetables. That way, you don't feel like you are spoiling a garden composition every time you gather some.decorative herbs A row of flowering herbs like lavender provides fragrant ornamentation and can be harvested late in the season to dry for the house.

Herb is the word - useful herbs mix up this area with mass plantings of several kinds of herbs. Some annual types such as basil and cilantro will go to seed quickly in hot weather, so include perennials like rosemary, sage and thyme.

Themes and variations - formally designed beds can be symmetrical without being mirror images. Contrast the yellow 'Russian Giant' sunflowers at upper left with a row of dark-brown 'Velvet Queen' sunflowers here.

morning glories, meet garlic. Highs and lows add some height Towering plants like these 'Russian Giant' sunflowers create a living fence. The rows of flowers will make an attractive see-through screen

All-season structure Nonbotanical elements like obelisks have an appealing formality and give composition to the beds early in the season, when seedlings are small.
not just mixed greens Introduce extra color by planting varieties with unusual-hued leaves like dark 'Red Sails' or frilly 'Lolla Rossa' lettuce.

Wednesday, July 16, 2008

Monthly Natter

I love the winter, its a favorite season second to autumn. What a contrast to summer: no scorching sun, no heat stress and definately no problem with water evaporation and winter greens...


Irish Potato and Kale Soup
Ingredients1 diced onion3 cloves chopped garlic5 large potatoes2 Tablespoons of olive oil6 small kale leaves2 cups of cut broccoli3 sliced spring onions1 cup roughly chopped parsleysalt and black pepper1/2 cup snipped chiveswaterMethodHeat oil, add onion and garlic and cook 3 minutes. Add diced potatoes and sufficient water to cover potatoes. Cook gently until potatoes are tender. Add remaining ingredients and cook for a few minutes until vegetables are just tender. Serve as is or add a spoonful of butter or cream or grated pecorino cheese.

Monday, June 23, 2008

Some Gardening inspiration

Look at some of these wonderful veggie plots, I only wish I could re-start mine. The keyhole example would definitely suit small yards as would the yin/yang round bed. As for the weaving, it just goes to show that you can have a beautiful creative garden and a productive one too! do as the lady with the little star garden is and Enjoy


What an entrance!


These could easily replace front lawns.
The ultimate water wise garden utilising a herb spiral permaculture water recycling and inter-planted with beneficial plants and vegetables.


I wish i had seen these before i designed my patch!!


This is how they do it in Africa, where soils are so poor they build em up and in the middle add the water and nutrients which leaches through. KGI has this video of keyhole gardens in Africa
http://www.youtube.com/watch?v=XjcjCCx3BWY


And finally weaving some magic. A lady in the Adelaide hills uses her prunings in a most beautiful way.